youssefrifi. Powered by Blogger.

Followers

Main Menu

About

Blogger templates

Pages

Monday, May 9, 2011

Is the LCD on your Blackberry Pearl 8100 series broken? Did you get your Pearl 8120 wet and the back light no longer works?  Is it hard to see the Blackberry Pearl LCD screen due to the crack in the LCD?
If you answered yes to any of these questions then this how to repair guide is for you.

To do this repair you will need a T6 torx screwdriver and a guitar pick (or any other small flat tip pry tool).
1. Turn off phone and remove battery.
2. Put the BlackBerry Pearl LCD side down.
3. Pry up lower bottom cover and lift gently towards the front side of the Pearl. There are 4 latches (2 in back, 2 in front) so be gentle. Refer to pictures below.
blackberry-pearl-loosen-bottom-cover-platelower-cover-removed-back-side-pearl-8100
4.  Remove the 2 screws on the bottom front of the Blackberry.
Blackberry-Pearl-remove-2-screws-lower-front
5.  Remove the 2 screws on the backside near the top.
remove-screws-at-the-top-backside-blackberry-pearl
6. Remove the 2 sides pieces as shown below. Once both side pieces are removed, you will have access to the clips that hold the top and bottom cover together on the Blackberry Pearl.
loosen-and-remove-side-panels-blackberry-pearl both-side-pieces-removed-pearl
7. Loosen the 4 clips on the sides using the guitar pick. See photo below for location of clips.clip-locations-for-blackberry-pearl
8. Lift off the back cover. lift-back-cover-off-BB-8100 9. Flip phone over and remove front cover by lifting it up.  As you can see, this exposes the blackberry pearl LCD screen.
remove-top-cover-BB-pearl
10.  Run the pick around the edge of the LCD screen to loosen it from adhesive holding it down.loosen-BB-pearl-screen-working-along-edges.
11. Find the connector at the top of the LCD and flip the retaining latch up to release the cable.flip-the-lcd-cable-connector-release 12. Remove the cable from the connector, lift and tilt the LCD up from the main board.
lift-lcd-from-blackberry-pearl 13. Install new LCD on the main board. Align new screen and make sure posts slide into position as shown in picture below.
make-sure-posts-get-seated-lcd-install-pearl
14. Slide LCD cable into the connector and clamp down by pressing black latch down.
insert-lcd-cable-back-into-connector
Note: Make sure that cable is seated firmly into connector. Failure to do so can cause display problems.
15. Install top cover back on the main board.
put-mainboard-back-into-top-cover-BB-pearl 16.  Install bottom cover back on.
put-back-cover-on-pearl-blackberry 17.  Press the two covers together firmly. Make sure the 4 latches snap back down.
snap-top-bottom-covers-together-
18. Install the side covers back on.
install-side-pieces-back-on
19. Install the screws on the backside near the top.   Removed in step 5.
20. Install the screws on the front side near the bottom.  Removed in Step 4.
21. Install the lower cover removed in step 3. Make sure it is firmly seated and latched down.
22. Install battery and back cover
23. Power on and test.
Enjoy your Blackberry Pearl LCD screen in all its freshly repaired glory.
If you have a white screen or the display is not functioning right, go back to step 14 and make sure the cable is seated fully into the connector.

Enjoy the new Blackberry Pearl LCD Screen!

Disclaimer: Disassembling your Blackberry Pearl 8100 Series Phone will void the warranty. Proceed with the following instructions at you own risk.  
is not liable for any damage that may occur. This website is in no way related to or associated with Blackberry or any Mobile Carrier.
Disclaimer: Disassembling your Cell Phone will void the warranty. Proceed with the following instructions at you own risk. http://www.crackedlcdrepair.com/ is not liable for any damage that may occur. This website and any information displayed on this website, contains restricted and/or privileged information and is intended only for authorized screening and/or confidential presentation at the author's discretion. If you are not the owner of this website, you must not disseminate, modify, copy/plagiarize or take action in reliance upon it, unless permitted by the author of this website. This website is in no way related to or associated with T-mobile, Nokia, Samsung, Motorola, Sharp, HTC, ATT, Verizon or Danger Inc

Read More
This is a how to repair guide for the HTC 620 / HTC 621 mobile phone.  Commonly referred to as the T-mobile Dash.   For some reason, the LCD screens on the Dash seemed very prone to breaking if you carried in your pocket or dropped it once.
The good news is you can repair it yourself.  A new LCD for the t-mobile Dash runs about 30 dollars on eBay and the procedure is pretty straight forward.  Be glad it’s not a slide phone!  Yeesh, changing LCD screens on that type of phone is a pain!

This guide is for replacing the LCD on your T-mobile Dash.  This will fix a dead back light, no display, cracked LCD screens, shattered LCD screens and just dead Dash LCD Screen in general.  If you have an HTC Excalibur with a broken screen then this procedure will work for you as well.
So without rambling by me, I present to you the HTC 6201/621 Dash LCD Screen Replacement Guide!!
Tools needed:
T6 torx Driver and some type of flat tip device for prying covers off.  A plastic guitar pick is my favorite choice.
Instructions:
  1. Turn of phone and remove battery and back cover.remove t-mobile dash back cover and battery
  2. Remove SIM card and memory card if installed.
  3. Remove 4 screws around the side of the phone.remove-4-screws-back-tmobile-dash
  4. Remove the screw caps on top backside and remove 2 screws underneath. The pry device is handy for removing the little black covers.remove-top-screws-and-covers-dash
  5. Remove the back cover.  Using the guitar pick, insert it into the button and work it around the cover. There are 4 snaps that need to be release to remove the cover. See the picture below for the approximate locations.remove-back-frame-4-snaps
  6. Remove the 1 screw on the main board. It is located in the corner near the camera.remove-screw-on-mainboard
  7. Release and disconnect the LCD connector. Lift the little brown retaining bar up. See below for reference.flip-up-connector-retainer-and-remove-lcd-cable
  8. Remove the keypad connector in the bottom left corner. Lift gently from the corner of the connector.remove-connector-for-keypad
  9. Remove the connector at the top of the main board.  Lift  brown retaining piece up  and slide out the cable. remove-connector-at-top
  10. Lift the main board off the top cover. Loosen the board from the cover by running your removal tool of choice arounf the edge.  Please use something plastic for this.   Grasp firmly and pull up and over.  See pictures below for reference.loosen-mainboard-from-top-coverlift-mainboard-from-front-cover
  11. Align the connectors and gently lift up the bottom side cover. Work the cables gently through the openings.work-connectors-through-coverremove-bottom-frame-of-top-cover
  12. Remove the T-mobile Dash LCD Screen.  remove-t-mobile-dash-lcd-screen
  13. Install the new LCD screen.
  14. Align the connectors and gently install the bottom side cover. Work the cables gently through the openings and push cover into place.  install bottom of top side frame tmobile dashgently work cables through bottom of top side cover
  15. Gently install the main board back into place.
  16. Reconnect the 2 cables removed in steps 8 and 9.
  17. Install the LCD cable back into the connector.  Make sure it is seated snugly and then push retaining clip down.   Caution: Failure to properly seat connector can cause a white display or no image on LCD at allinstall-lcd-cable-back-into-connector
  18. Install the screw removed in step 6 back into the main board.
  19. Double check all of the connections to make sure they are seated firmly.
  20. Install the back cover on. Make sure to firmly snap back into place all around the edge.
  21. Install the 4 screws from the sides.
  22. Install the 2 screws on the top.
  23. Install the battery and the battery door.
  24. Power on your HTC 620 / 621 and check out the new LCD.
  25. If the LCD is white or not functioning properly, go back to step 17 and make sure the cable is seated firmly.
That is all there is to it.  Go out and enjoy your newly repaired T-mobile Dash with its fully functional LCD Screen in all it’s splendor!
If you need a new LCD Screen for your T-mobile Dash, check out the link below.

Read More
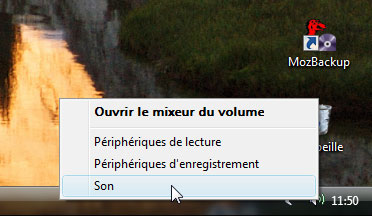
Si vous êtes utilisateur de Windows Vista, voici un guide qui vous aidera à changer le son du démarrage de votre ordinateur. Ecoutez et choisissez le son qui vous convient. Une fois votre son identifié, effectuez un clic droit de souris sur le mot WAV correspondant :

La boîte de dialogue s'ouvre (onglet Sons) :
 

Dans la zone des évènements, faites défiler la liste pour atteindre Ouverture de session Windows. Une fois sélectionné, cliquez sur le bouton Parcourir puis "aller chercher" le son que vous venez de télécharger, en double-cliquant dessus. Celui-ci apparaît alors automatiquement sous l'intitulé Sons : . Testez-le pour vérifier puis cliquez sur le bouton OK pour valider votre nouveau choix.


Read More

Sunday, May 8, 2011


Memory
Practically unlimited entries and fields, Photocall
Practically unlimited
1.1 GB ROM, 768 MB RAM
microSD, up to 32GB, buy memory

Data
No
No
Rev. A, up to 3.1 Mbps; HSPA
Wi-Fi 802.11 b/g/n, DLNA, Wi-Fi hotspot
Yes, v2.1 with A2DP, EDR
No
Yes, microUSB v2.0

Camera
8 MP, 3264x2448 pixels, autofocus, dual-LED flash
Geo-tagging, touch-focus, face detection, image stabilization
Yes, 720p@30fps
Yes, 1.3 MP

Features
Android OS, v2.2 (Froyo)
1 GHz Scorpion processor, Adreno 205 GPU, Qualcomm MSM8255 Snapdragon
SMS(threaded view), MMS, Email, Push Email, IM
HTML
Stereo FM radio with RDS
Yes
Black, Red
Yes, with A-GPS support
Yes, via Java MIDP emulator

- SNS integration
- Digital compass
- Dedicated search key
- Google Search, Maps, Gmail
- YouTube, Google Talk, Picasa integration
- MP3/AAC+/WAV/WMA player
- DivX/XviD/MP4/H.263/H.264/WMV player
- Organizer
- Document viewer
- Voice memo/dial/commands
- Predictive text input

Battery

Standard battery, Li-Ion 1450 mAh
Up to 361 h
Up to 6 h 30 min

Misc
1.29 W/kg (head)     1.44 W/kg (body)    
Read More
Voila mon coté geek ? encore frappé ! Je n’ai pas résisté ? acheter le HTC touche le petit dernier des PDAphone. Tactile, fin, beau, un écran très lumineux et le tout sur windows mobile 6 (microsoft) ! Bon dans ma lancé je vais faire un petit test de cette HTC Touch chez Top Logiciel. 


Read More

Saturday, May 7, 2011

Nous savions déjà que l’iPhone faisait beaucoup de choses, ce qui le mettait à la pointe de la technologie. Mais l’iPhone 3GS nous a réservé une petite surprise. C’est en testant le mode vidéo de son nouvel iPhone 3GS qu’il a découvert une chose pour le moins époustouflante. Nous vous laissons découvrir les images qui suivent.
Comme vous venez de le voir, l’iPhone 3GS est résistant à l’eau, mais ce n’est pas tout. Voyez donc plutôt :
Ceci est incroyable, l’iPhone 3GS fonctionne sous l’eau. Apple aurait donc trouvé la solution contre la pastille rouge qui s’affichait lorsque l’iPhone 3G était en contact avec de l’eau.
Read More
Encore un énième clonage tout droit sorti d’une usine Chinoise. Mais cette fois, la donne est quelque peu différente puisque la cible de ce pompage semble avoir été le Nokia Aeon, annoncé il y a déjà un petit moment et qui devrait s’afficher comme un téléphone entièrement sensitif. Évidemment, la copie n’utilise pas ce procédé, et ne reprend que le design du projet de Nokia. Le Weimei W168 est donc simplement équipé d’un écran 2.2″, lis les MP3, MP4 et jouit d’un capteur 2 megapixels.


Read More

Recent News

© 2014 . | Distributed By My Blogger Themes | Designed By Bloggertheme9